Building a CI/CD pipeline in Azure DevOps is a powerful way to automate and streamline your development and deployment process. In this blog, we’ll learn how to leverage the Azure Pipelines to streamline the Power Apps deployment process, saving time and effort.
Prerequisites
- Azure DevOps account with Repository access.
- Azure Portal access to create Azure AD App registration.
- Power App System Administrator access
Create an App registration in the Azure Portal
First, navigate to Azure portal > App registrations and create a new One.
Name it something like Power Apps CI/CD App and select the account type as Accounts in this organizational directory only.
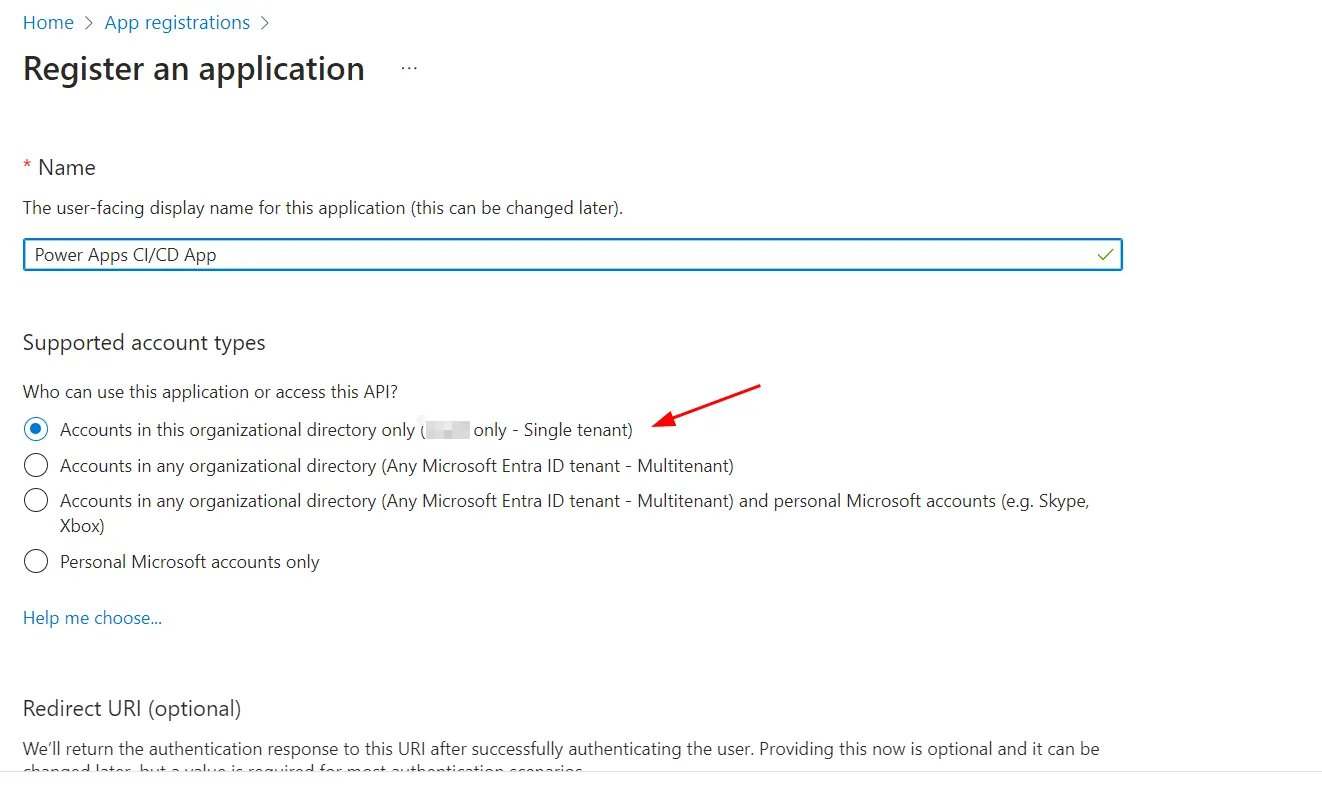
Note down the Tenant ID and Application ID (Client ID), we will need it later.
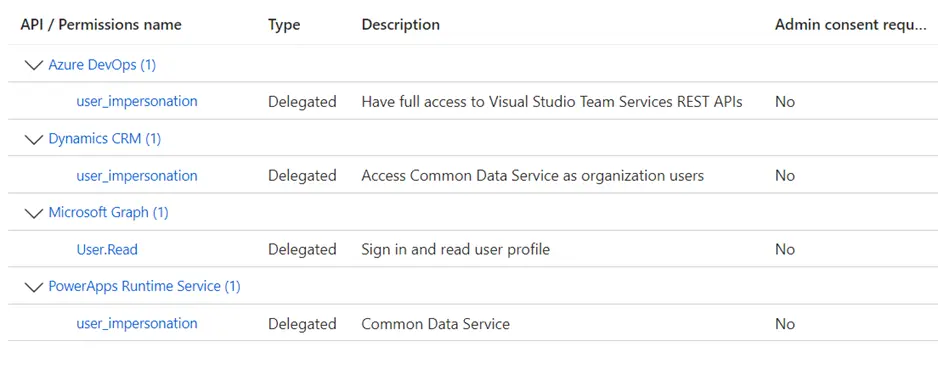
Now navigate to API permissions and make sure it has the following API permissions –
- Azure DevOps (user_impersonation)
- Dynamics CRM (user_impersonation)
- Microsoft Graph (User.Read)
- Power Apps Runtime Service (user_impersonation)
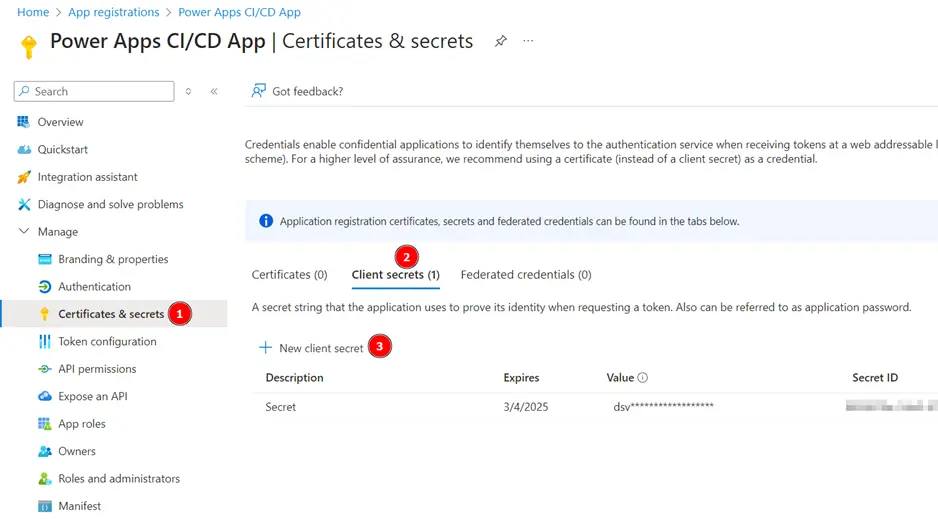
Now, navigate to Certificates & secrets and create a new Client Secret. Copy the value of the client secret as it will be shown only once.
Create Application User in Power apps
Navigate to Power Apps admin center. Select your source environment (usually the one where you do development).
Go to Settings > Users + permissions > Application users.
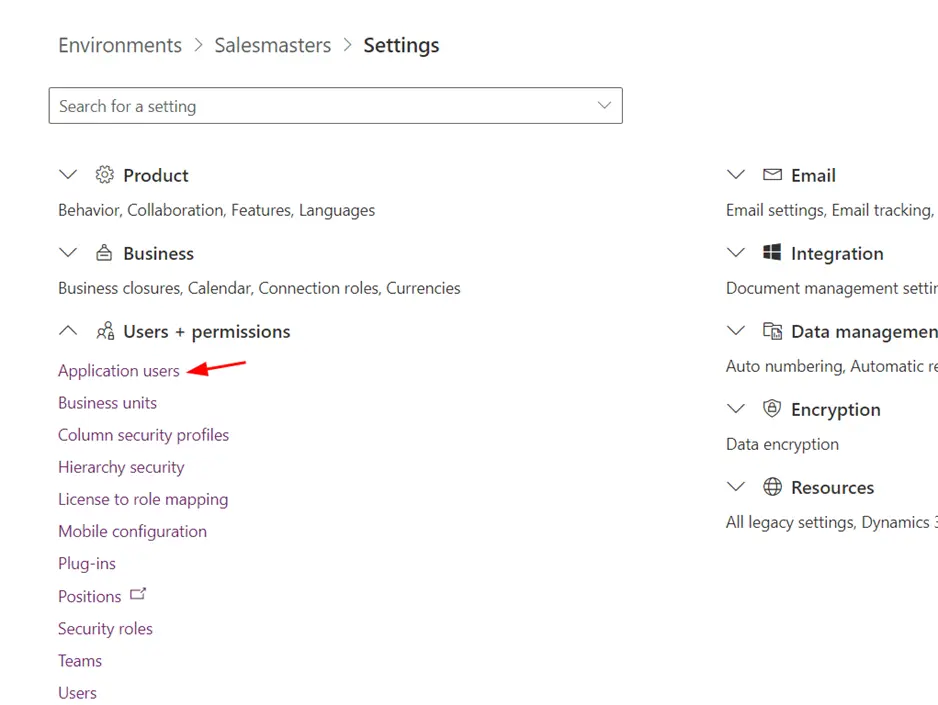
Select Add new user from the top bar.
Click Add an app and select the app we have created in Azure in the previous step.
Select the business unit and assign the System Administrator security role to the user.
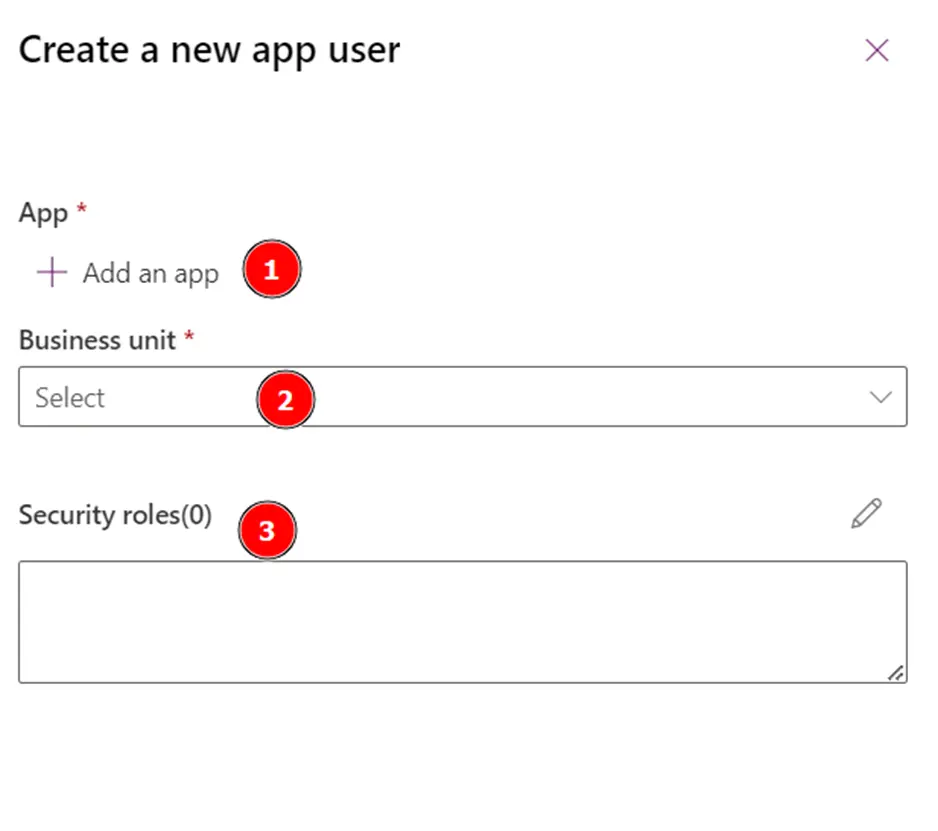
Similarly, create an application user for your target environment using the same app registration.
Create a service account in Azure DevOps
Navigate to Azure DevOps.
Go to your project settings and navigate to Service Connections.
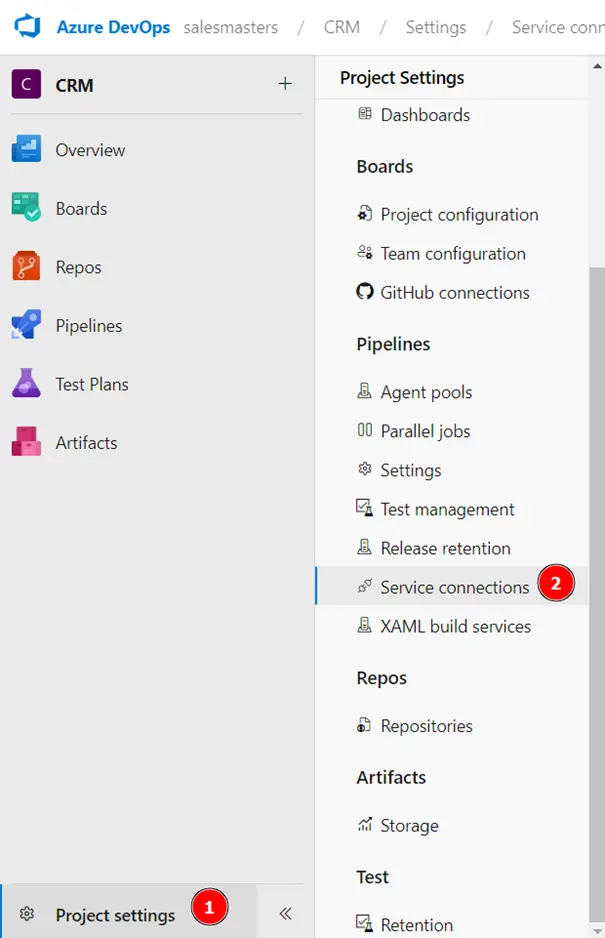
Click on Create New Connection.
Search for the connection type named Power platform.
If you did not find the connection in the list then you have to install it in your DevOps organization. Go to the marketplace and install this extension.
In the Authentication method select Application ID and Client Secret. In Server URl, enter the URL of your source Power apps environment, for example, https://acme-dev.crm5.dynamics.com.
In Tenant ID, enter the tenant ID from the App registration we have created previously.
Enter the Application Id and Secret from the app registration we have created previously.
Give it a descriptive name such as Sales 365 DEV.
Make sure to check the checkbox to Grant access permission to all pipelines.

Similarly, follow the same steps to create a service account for your target environment.
Create a Build Pipeline
First, create a repository if it does not exist already.
Navigate to Azure DevOps > Select your project > Pipelines
Make sure the option to create Classic Pipelines is enabled at your organization and project level. For more details read this tutorial.
Create a new pipeline. While creating a pipeline, select the option at the bottom to use the Classic editor.
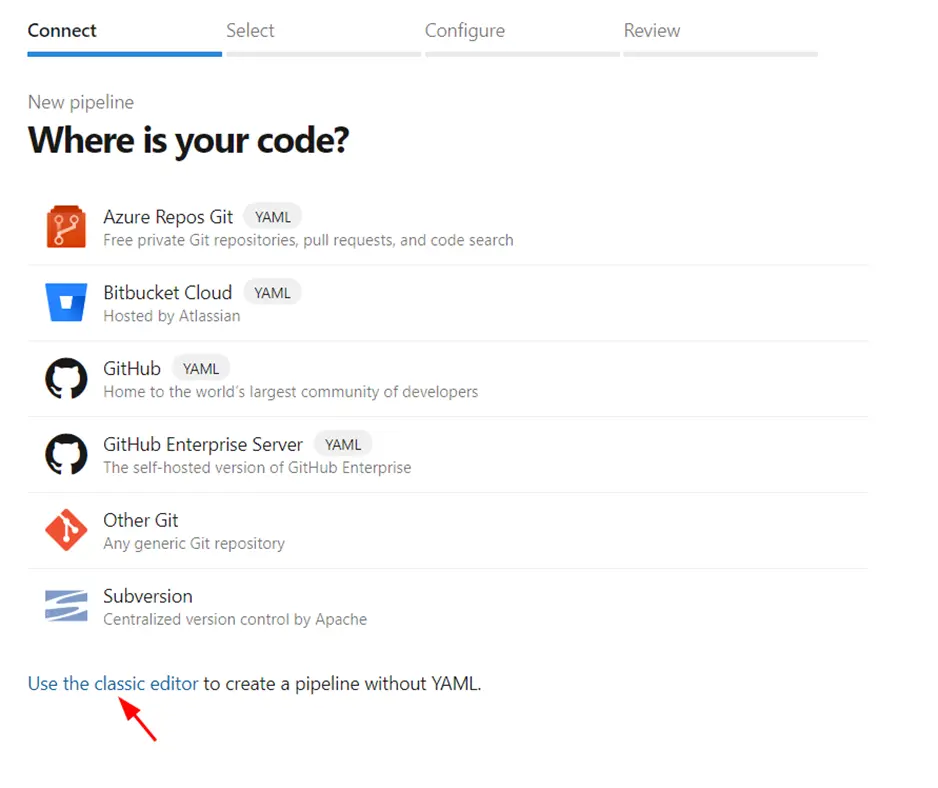
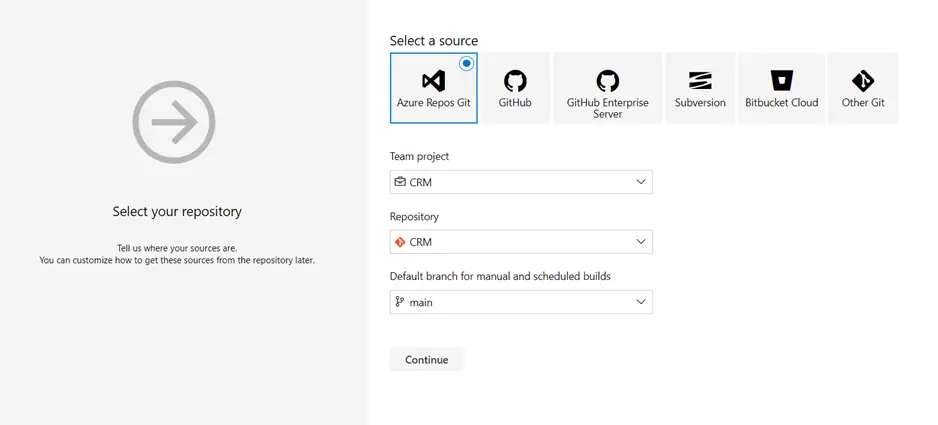
Select your source, in this case, Azure Repos Git, select your project, Repository, and default branch, and select Continue.
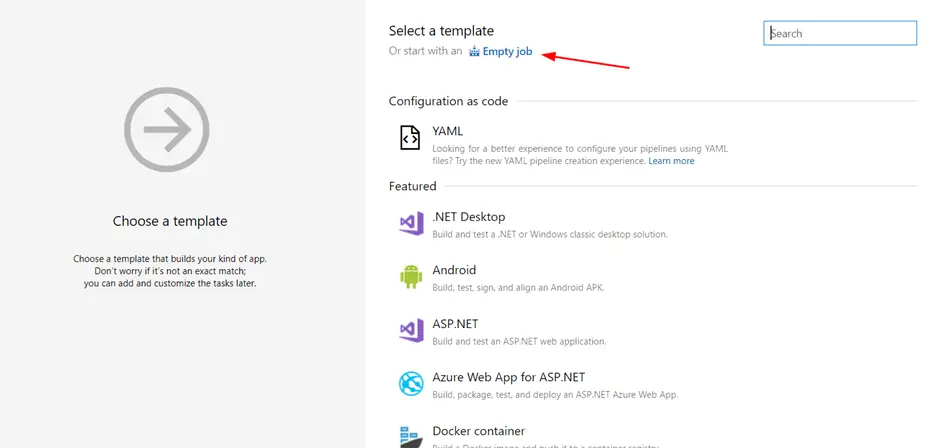
On the next screen, select Start with Empty Job.
Give your pipeline a name.
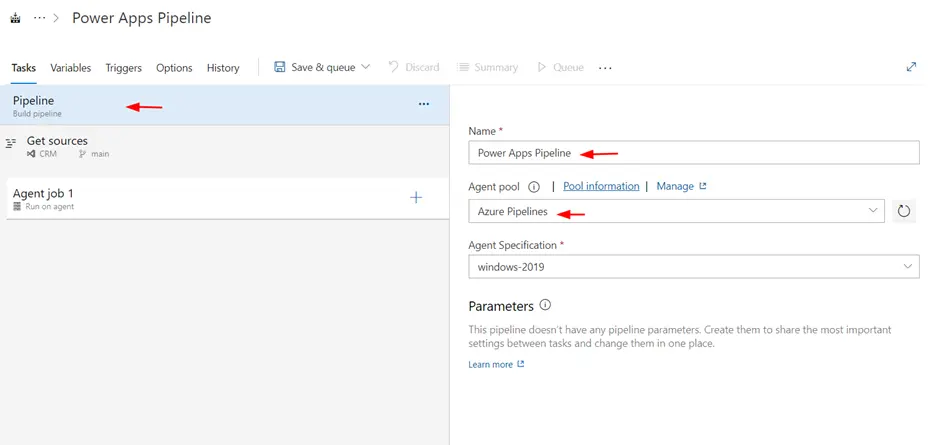
Select your agent, and give it a name, like Power Apps agent.
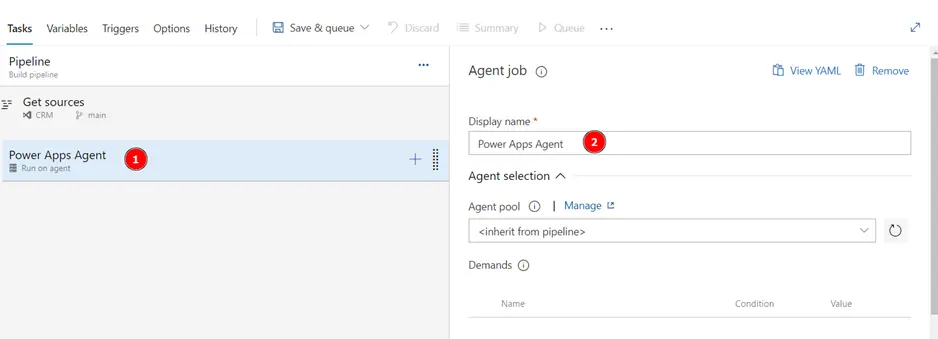
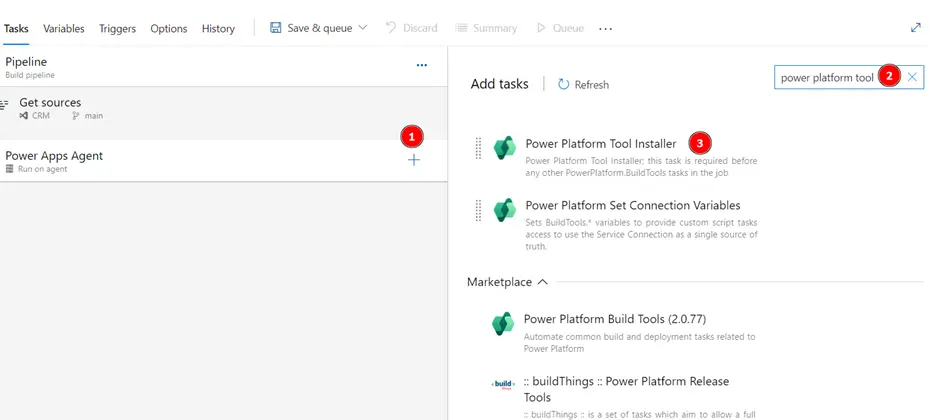
Now add the first task to your pipeline. Click on the + button on your agent.
Search for a task named Power Platform Tool Installer and click Add.
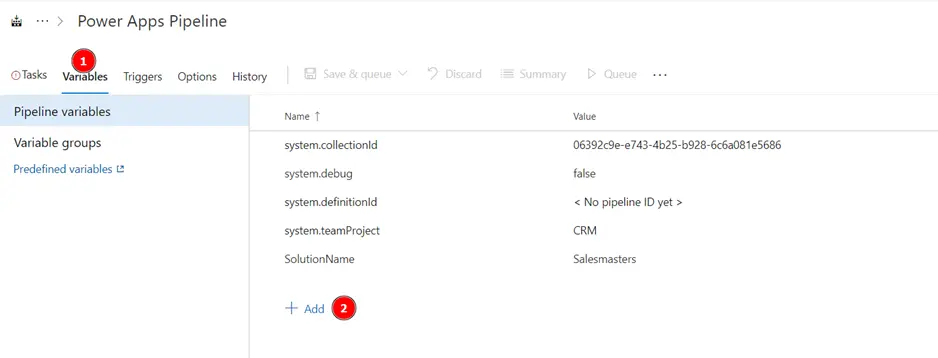
Create a new variable named SolutionName for your pipeline. It will be used in further steps.
Go to Variables tab and click Add.
Give it a value of your solution name in power apps (NOT Display Name).
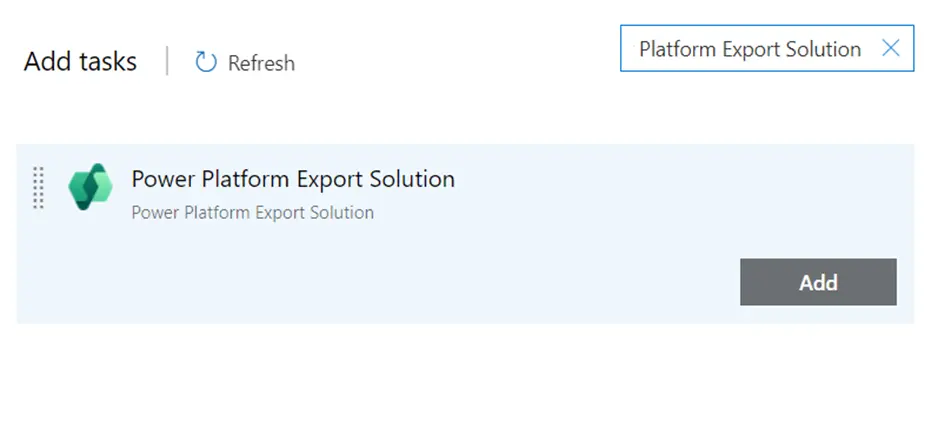
Now add the second task to your agent.
Again, click on the + button and search for a task named Power Platform Export Solution.
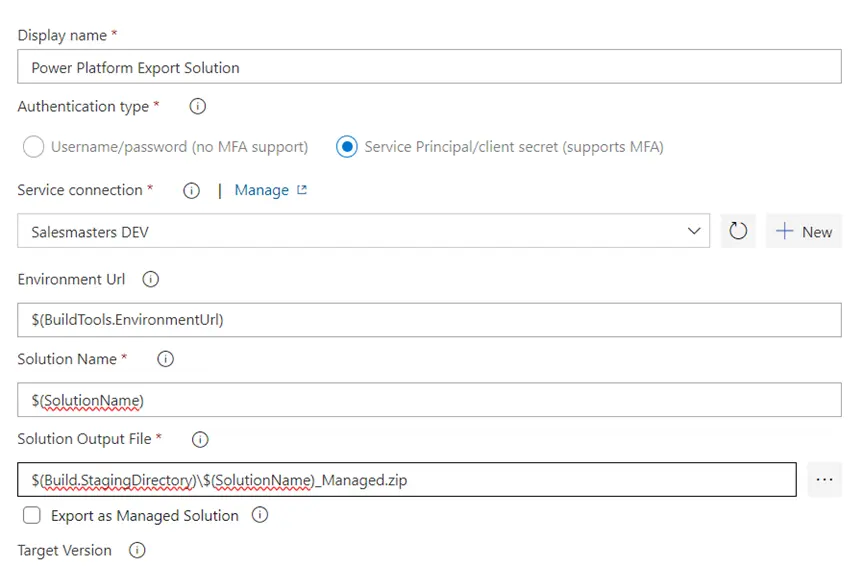
Choose the Authentication type as Service Principal/Client secret.
Choose your service connection (source) created in the previous section.
In Environment Url, add $(BuildTools.EnvironmentUrl). This will be replaced with the current environment URL of the logged-in user from the previous step.
In the solution name, we will use the environment variable we have created in the previous step. To use variable give it a value like $(SolutionName).
In the solution output file, give it a value something like $(Build.StagingDirectory)\$(SolutionName)_Managed.zip.
Here we are using the staging directory as a temporary directory to store the exported solution.
Learn more about available environment variables in azure pipelines here.
Check the box Export as Managed Solution, if required.
Add a new task named Power Platform Unpack Solution.
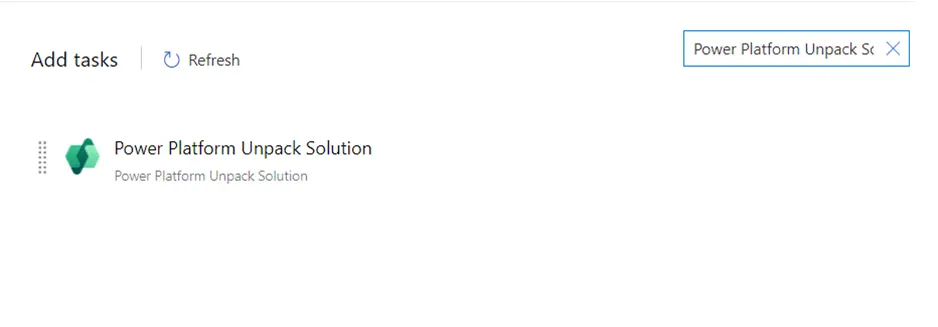
In the Solution input file field, give it a path that we have used to store the solution in the previous step $(Build.StagingDirectory)\$(SolutionName)_Managed.zip.
In Target Folder to Unpack Solution field, give it a value of the directory you want to store the solution components in, for example, $(Build.SourcesDirectory)\$(SolutionName)\Managed
Here SourceDirectory is the directory where the repository content is stored.
Choose the type of solution.
Now, add a new task named Publish build artifacts to publish artifacts that can be used later in the release pipeline.
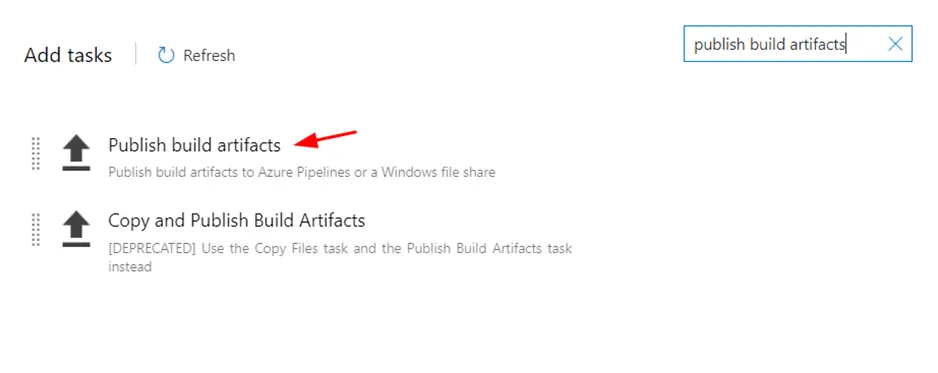
In the Path to Publish field give it the directory where we unpacked the solution in the previous step, for example,
$(Build.SourcesDirectory)\$(SolutionName)\Managed
Give your artifact a name.
Add a new task named Command line.
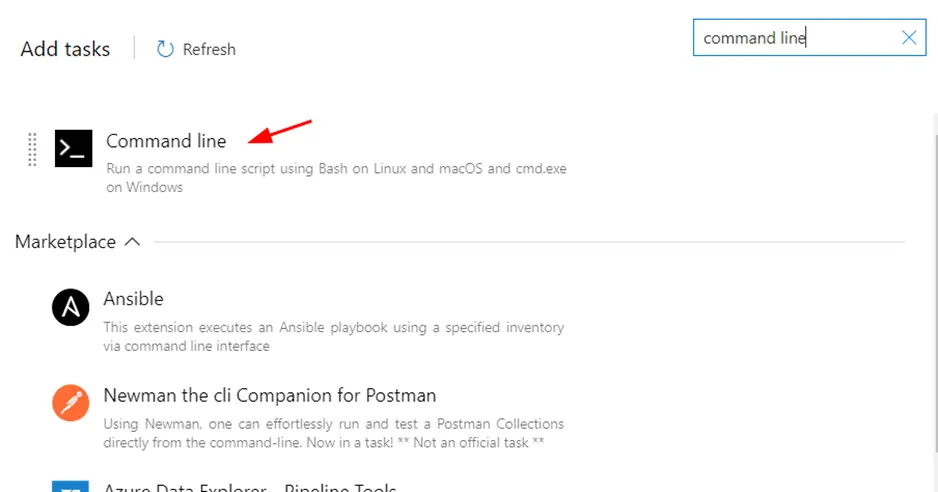
We are using this task to commit and push the solution components in the Azure repository.
In the script section add the following script –
git config user.email dev@power365tips.com
git config user.name "CI/CD Automation"
git checkout -B main
git pull
git add --all
git commit -m "Updated solution components"
git -c http.extraHeader="AUTHORIZATION: Bearer $(System.AccessToken)" push origin main
Make sure that the Allow scripts to access the OAuth token option is checked in your agent configuration. It is required to commit the changes to the repository.
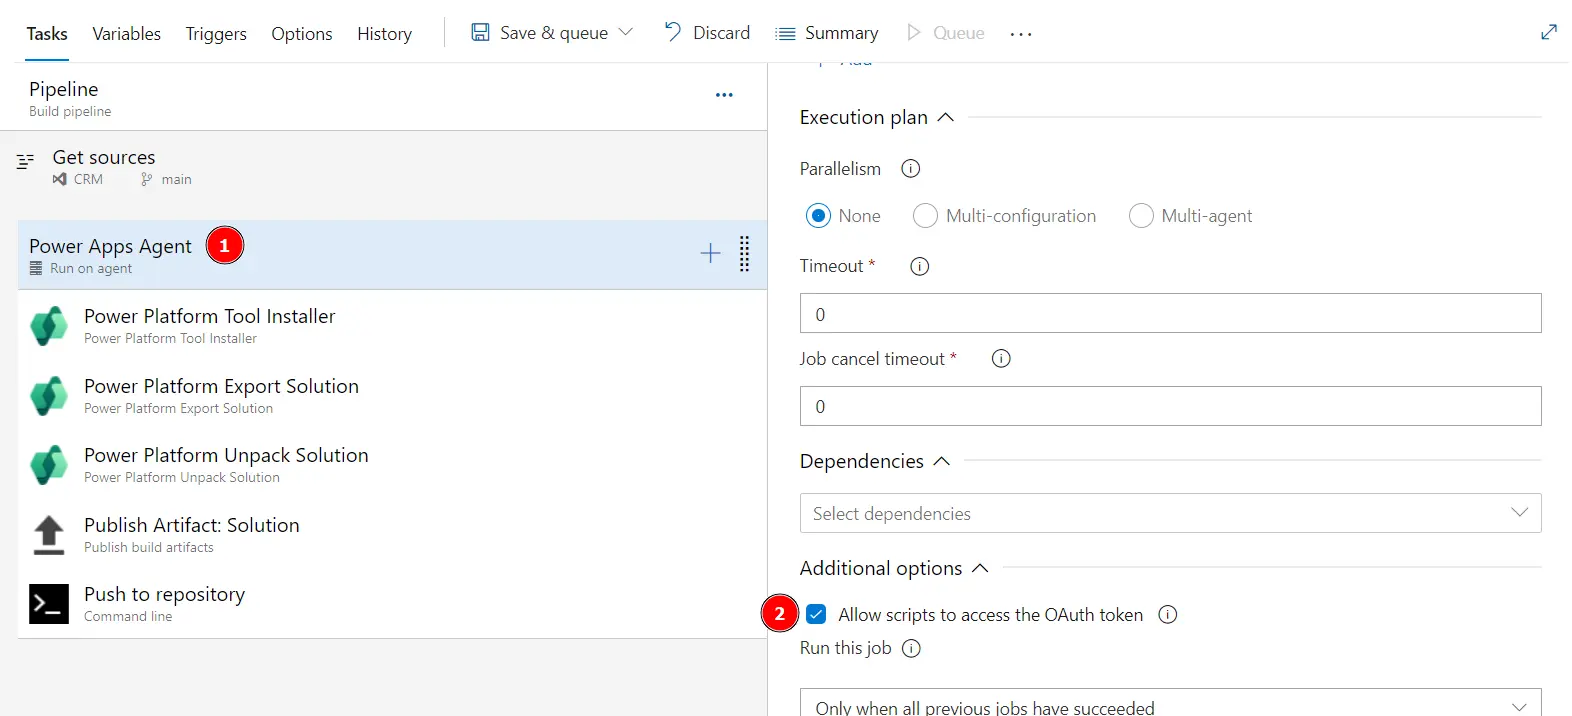
Save your changes.
Create a release pipeline
Now we will create a release pipeline to import the solution to target environments like UAT, Pre-prod, or Production, etc.
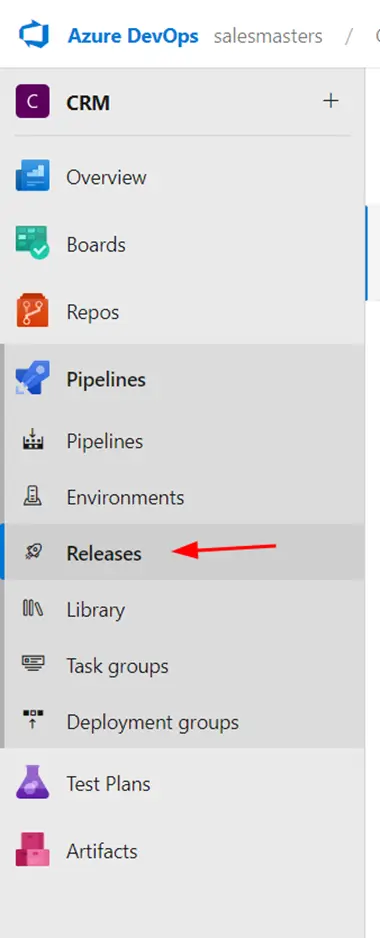
First, navigate to Pipelines > Releases.
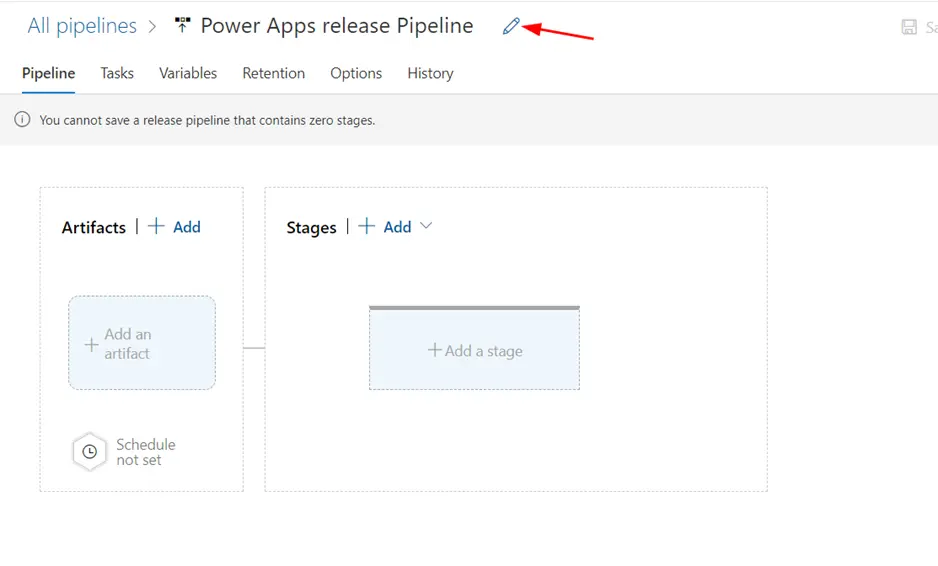
Give your pipeline a name.
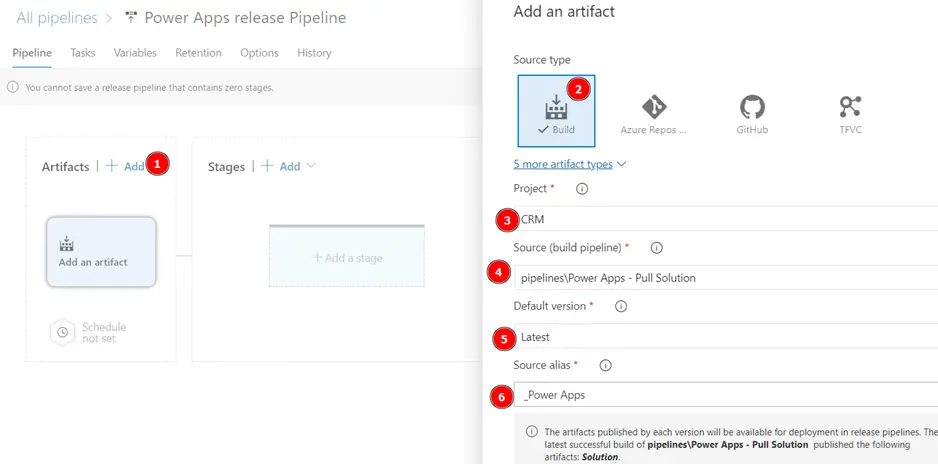
Click on Add artifact.
Select the source type as Build.
Select your project.
Select Source (build pipeline) as the pipeline we have created previously.
Keep the default version to the Latest
Name the source alias something like _Power Apps
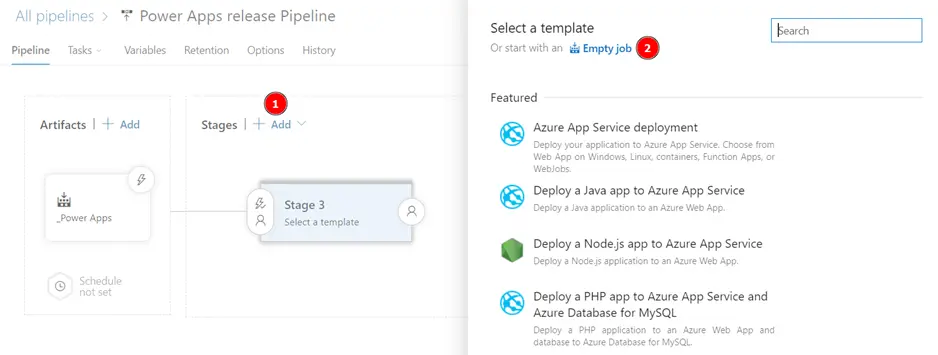
Now click on Add Stage and select an Empty job.
Name the stage to something like Release to UAT.
Now click on tasks below the name of the stage. This will open an editor like before to add tasks to your pipeline.

Add the first task to the agent named Power Platform tool installer as we have done for the build pipeline previously.
Create the same variable named SolutionName for this stage also.
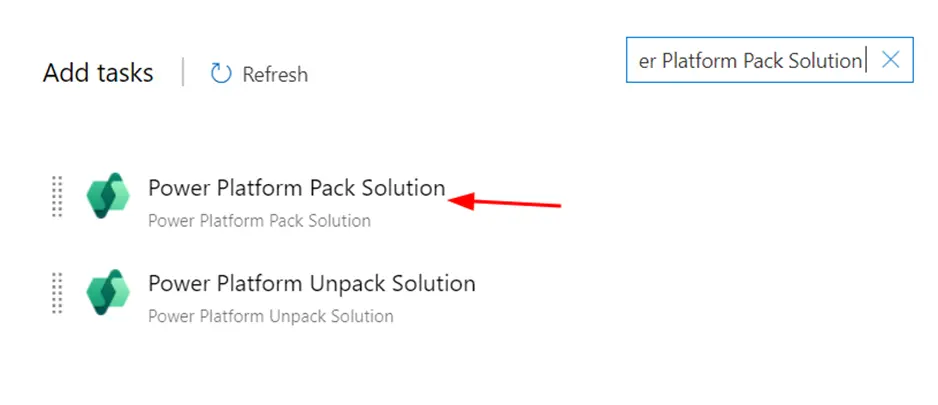
Add the second task named Power Platform Pack Solution to pack the solution.
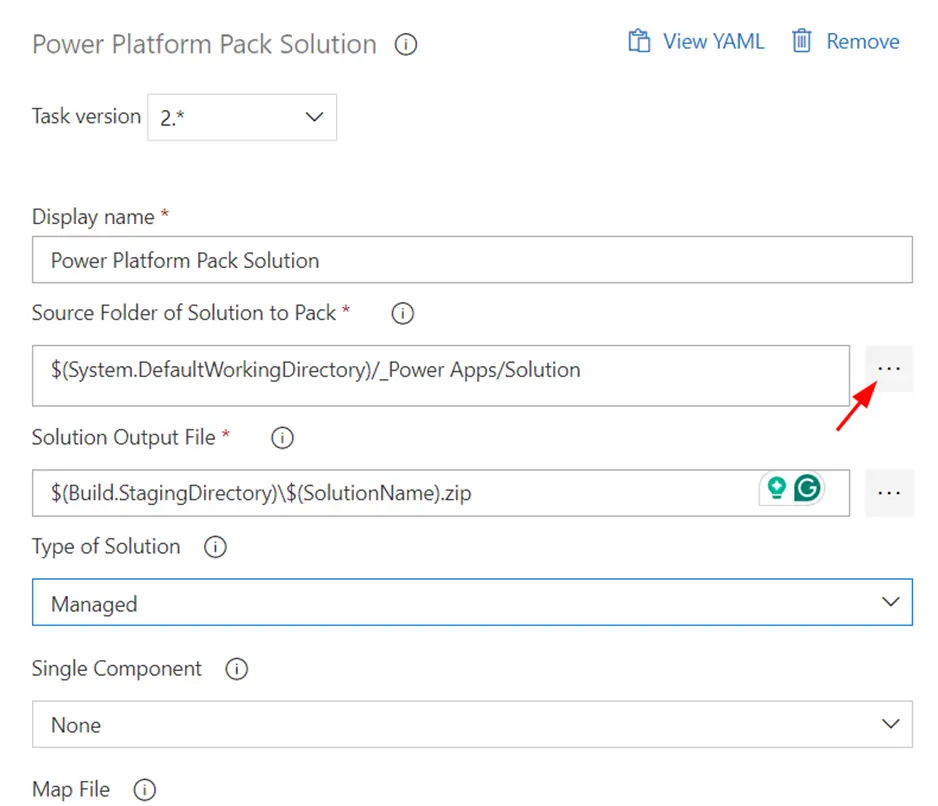
In the source folder field, use the three dots on the right side to select the parent folder which contains the solution components, and select Ok. It should be something like $(System.DefaultWorkingDirectory)/_Power Apps/Solution.
For the Solution Output file, set it as $(Build.StagingDirectory)\$(SolutionName).zip.
This is a temporary location where the packed solution will be created for import.
Choose the correct type of solution you want to create.
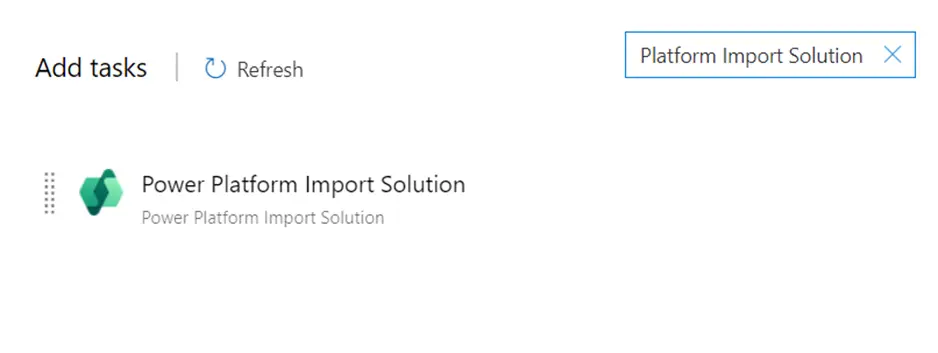
Next, add a task named Power Platform Import Solution.
Choose the Authentication type as a Service principal.
Select the appropriate target service connection. In the environment URL, keep the default $(BuildTools.EnvironmentUrl).
In the solution input file, set $(Build.StagingDirectory)\$(SolutionName).zip
This is the path we set to pack the solution in previous step.
Now save the pipeline.
Similarly, you can also add more stages to it, like Pre-prod, Production, etc.
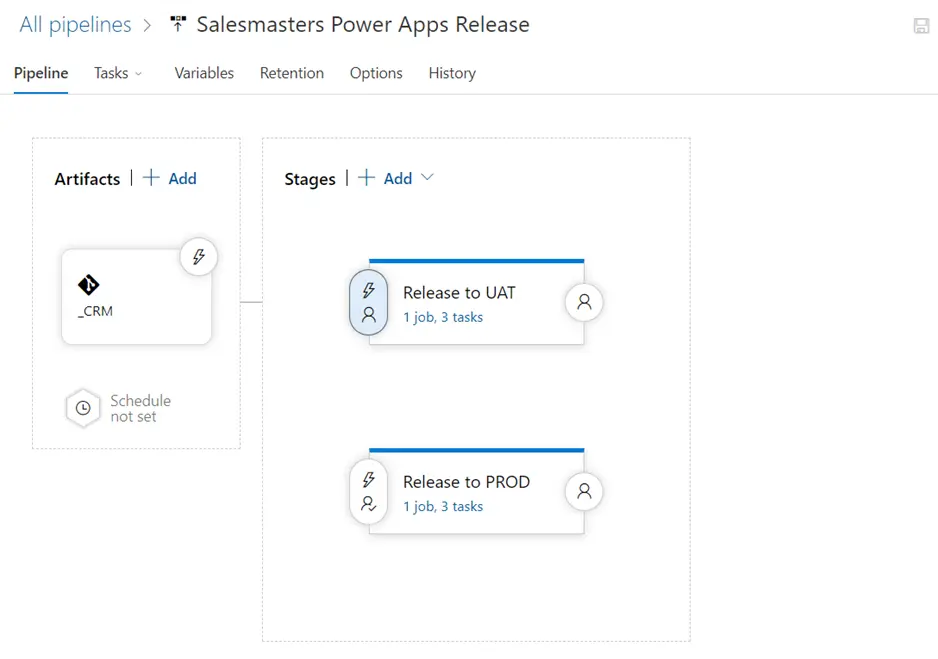
Now, to create a release, go to all pipelines, select your release pipeline, and click Create release.

